Breaking News
Loading...
  • New Movies
  • Recent Games
  • Tech Review

VIDEOS

Tech News

Game Reviews

Recent Post

Showing posts with label Recipes. Show all posts
Thursday, June 25, 2015
Strawberry Lemon Shortcake

Strawberry Lemon Shortcake

Strawberry Lemon Shortcake


Ingredients:

Biscuits
2 cups all purpose flour
¼ cup granulated sugar
1 tablespoon baking powder
½ teaspoon baking soda
¼  teaspoon salt
6 tablespoons chilled butter, cut into small pieces
1 ¼ cups low fat buttermilk
Zest of 1 lemon
Cooking spray

½ cup all purpose flour
1 tablespoon butter, melted
1 teaspoon of sugar for sprinkling

Strawberry mixture
4 cups sliced strawberries
¼ cup granulated sugar
Juice of 1 lemon
1 ¼ cup natural frozen whipped topping, thawed

Directions
Preheat oven to 425 degrees
Step 1. For the biscuits combine in a large mixing bowl flour, ¼ cup sugar, baking powder, baking soda, and salt. Using two knives cut in the chilled butter until it resembles a coarse meal texture. Combine the buttermilk and lemon zest then add it to the flour mixture. Toss gently until it is moist. The dough is going to be wet and sticky. This is what it will look like – kinda like cottage cheese.
Step 2. Coat a baking sheet with cooking spray.  Add ½ cup of flour to a dish. Divide the dough into 10 equal portions and set them into the dish. Shape each piece of dough into a round portion by using some of the flour. Shake off the excess flour and place each one onto the baking pan. Just so you are aware this part is a messy one. The dough is sticky and a little hard to handle but don’t worry it all comes out good.
Step 3. Brush the dough with melted butter and sprinkle the teaspoon of sugar over all of them.
Step 4. Bake for 18 – 22 minutes. Mine only baked for 18 minutes. If I would have left them in longer they would have burned so make sure to keep an eye on them. Once done let them cool completely on a wire rack. This only takes about 20 minutes.
Step 5. Combine the strawberries, ¼ cup sugar, and lemon juice. Toss it all together until it is coated evenly.  Let it stand for about 10 – 15 minutes.
Step 6. Spoon 1/3 cup strawberry mixture and 2 tablespoons of whipped topping onto 1 biscuit.

Make Ahead Instructions

The biscuits and strawberries can be prepared ahead of time and store separately in the refrigerator. Assemble the night you want to eat.
If you want the biscuits can be made and frozen ahead of time. Take out the day you want to eat and let them thaw on the counter. The biscuits should only take about an hour to completely thaw.
Turkey Ranch Club Wrap

Turkey Ranch Club Wrap

Turkey Ranch Club Wrap


Ingredients
  • 1 Flatout Wrap (I used the multi-grain with flax)
  • 2 ounce of smoked turkey (I used Plainville)
  • ½ slice sharp american cheese
  • 2 slices cooked bacon** (I use Applegate farms)
  • 1 tablespoon Ranch yogurt dressing (I use Wegman's brand)
  • 2 tomato slices
  • Romaine lettuce (you could also use baby spinach)
Instructions
  1. Spread ranch dressing over the center of wrap. Add turkey, cheese, bacon, tomato, and romaine.
  2. Fold sides in and then roll up.
Nutrition Information
Serving size: 1 wrap Calories: 307 Fat: 16 Carbohydrates: 23 WW Points +: 9 Fiber: 9 Protein: 29


Fresh Mozzarella and Tomato Salad

Fresh Mozzarella and Tomato Salad

Fresh Mozzarella and Tomato Salad


Ingredients
  • Salad:
  • 2 cups of cherry tomatoes
  • 8 oz fresh mozzarella - bocconcini or ciliegine - small round cheese
  • 2 tbs minced parsley
  • Dressing:
  • 3 tbs olive oil
  • 1 tbs red wine vinegar
  • 1 small garlic cube - minced
  • 8 twists of black pepper
Instructions
  1. Slice cherry tomatoes in half - I used a combination of yellow and red tomatoes.
  2. Slice mozzarella balls in half (you want the size to be similar to the sliced cherry tomatoes). It's important to use fresh mozzarella in this salad.
  3. Whisk together olive oil, red wine vinegar, minced garlic and pepper. Pour over mozzarella and cherry tomatoes.
  4. Sprinkle parsley over salad and toss gently until combined.
  5. Let sit 15 minutes before serving so the flavors marinate.
Wednesday, June 24, 2015
Carrot Bundt Cake

Carrot Bundt Cake


Ingredients:

For the Cake:

  • 2 cup granulated sugar
  • 1 cup canola oil
  • 4 large eggs
  • 2 cup all-purpose flour
  • 1 tsp baking soda
  • 1 tsp baking powder
  • 2 tsp cinnamon
  • 2 cup shredded carrots
  • 1 cup Fisher Chopped Pecans

For the Filling:

  • 1 package (8oz) cream cheese, softened
  • 1/3 cup granulated sugar
  • 1 tsp vanilla extract
  • 1 large egg

For the frosting:

  • 4oz cream cheese, softened
  • 3 Tbsp milk
  • 2 cup powdered sugar
  • 1/4 cup Fisher Chopped Pecans

Directions:

  1. Preheat oven to 350 degree F. Spray a 12 cup bundt pan generously with baking spray. Set aside.
  2. In a large bowl, combined all the ingredients for the cake, mixing until well combined. Batter will be very thick! Set aside.
  3. For the filling, beat cream cheese with sugar, vanilla and egg until smooth and creamy. Set aside.
  4. To assemble, fill bottom of sprayed bundt pan with about 3/4 of the batter. Spoon the cream cheese into the pan, being careful not to let it touch the sides of the pan. Spoon the remaining batter over the cream cheese layer. It's okay if it doesn't cover completely.
  5. Bake cake in a preheated oven for 60-65 minutes. Cake will be browned and will pull away from the pan when done. Remove from oven and cool for 5-10 minutes before inverting onto a wire rack. Cool completely before frosting.
  6. For the frosting, beat cream cheese, milk and powdered sugar together until smooth and creamy. Pour frosting into a large ziploc bag and snip off the corner. Pipe onto cake, generously. Sprinkle immediately with chopped pecans.  
Chocolate Tres Leches Cake

Chocolate Tres Leches Cake


Cake
1 box devils food cake mix (Duncan Hines), plus ingredients to make cake
2 tsp cinnamon

Milk Mixture
1 can sweetened condensed milk
1 (12oz) can evaporated milk
1 cup half-and-half
2 Tbsp cocoa powder

Whipped Cream Topping
2 cups heaving whipping cream
1/2 cup powdered sugar
1 tsp vanilla extract
cherries

Mix cake mix, cinnamon, plus ingredients to make the according to package directions. Bake in a greased and floured 9x13 pan. Cool completely.

Mix together sweetened condensed milk, evaporated milk, half and half and cocoa powder. Poke holes in cake and slowly pour milk mixture over cake. Cover and refrigerate overnight.

When ready to serve, whip together heavy cream, powdered sugar and vanilla extract. (I chill my mixing bowl in the freezer for 5-10 minutes before adding the cream and sugar). Whip at high speed for 1-2 minutes. Spread over cake and top each slice with a cherry.
Cardamom Plum Trifle with Pomegranate and Pistachios

Cardamom Plum Trifle with Pomegranate and Pistachios

Cardamom Plum Trifle with Pomegranate and Pistachios
from: stylemepretty.com 


prep time
40 Minute/s
cook time
30 Minute/s
total time
1 Hour/s 10 Minute/s
Ingredients
  • 8-10 purple plums
  • 1/4 cup of sugar
  • 2 pods of cardamom
  • 1 1/2 cups of your favorite vanilla pudding or custard.
  • 2 cups of cubed yellow cake. (I used leftover cake I had in the freezer. You can use store bought loaf cake.)
  • 1 cup of whipping cream
  • 2 tablespoons of sugar
  • 1/4 cup of crushed pistachios
  • 8 whole pistachios, peeled
  • 2 tablespoons of pomegranate seeds
Instructions
  1. Cut plums into quarters and add to small saucepan. Add sugar, cardamom pods and a splash of water. Bring to a boil, then turn down heat and let simmer until plums are soft and break apart. Take off heat, let cool and remove cardamom pods.
  2. Fill 8 glasses with 1/4 cup of vanilla custard/pudding. Top each one with a couple of cubes of cake, distributing nicely so cake pieces are seen around the glass.
  3. Once plums are cooled, spoon 2-3 tablespoons of plums on top of pudding and cake.
  4. Sprinkle each glass with 2 teaspoons of crushed pistachios.
  5. Whip your cream with the sugar. You can do this with a mixer, but whipping by hand will give you nicer whipped cream.
  6. Gently top each glass with whipped cream.
  7. Sprinkle with pomegranate seeds and one pistachio nut.
  8. Serve immediately!
Tuesday, June 23, 2015
The modus operandi of Moussaka with minced meat and béchamel

The modus operandi of Moussaka with minced meat and béchamel


1 Kg eggplant
250 g minced meat
4 tbsp tomato paste
5 tomatoes, juice
5 large cloves garlic
3 tbsp oil
Salt
Hot green pepper
A small spoon cumin
Teaspoon Bharat (spice) A small spoon nutmeg
Teaspoon black pepper
Cup water
2 cups Bashimil

prepare

1. Peel the eggplant and cut rings and then fried in oil, filtered and lifted aside.
2. In a saucepan on the fire, fry the garlic, pepper both types a little oil, add the minced meat and stir and simmer, put tomato juice, spices and leaves on the fire a little.
3. placed eggplant with minced meat and turned the well.
4. components are placed in the tray and then distributes Albashimil on the face, intervention Almsagah average temperature oven for 15 minutes.
recipe Daoud Pasha

recipe Daoud Pasha


Ingredients

500 grams minced meat
2 medium onion, chopped fine
½ kilo tomato juice
½ cup tomato paste
Salt and pepper and cinnamon

prepare

1. Add the onion to half the amount of meat, salt, pepper, cinnamon, constitute the form of small balls.
2. Fry the balls a little oil.
3. Keep in another as the remaining onion with a little oil, fry to fade and then add the tomato juice with tomato paste, salt and cinnamon and simmer until it boils.
4. Add the meatballs to it and leave it on the fire a quarter of an hour and then offers Daoud Pasha .


Koshary Egyptian gorgeous

Koshary Egyptian gorgeous

Kosheri

Kosheri amounts Egyptian delicious

1/2 kilogram white rice
1/2 kg Pasta, small
1/4 kg brown lentils
1/2 kg of Homs, soak two hours before preparation
1 kg tomatoes
1/2 kg onions
11/2 cup oil

How to prepare a delicious Egyptian Kosheri

1. Chop the onion into slices and browns in the whole amount of oil until it becomes golden "with continuous stirring until it becomes crispy."
2. Drain the onions from the oil well and leaves on a napkin until it absorbs the oil.
3. Drain pasta and climb and we take part of the oil that was reddening onions in it and turn the pasta him.
4. Boil the lentils and stir a portion of the oil also with the addition of salt and cumin.
5. Fry the vermicelli in a part of the oil is added to it and also white rice after washing with water, salt and cumin.
6. Nfaram garlic with salt and we take part of it and blush in a part of the former oil and then add the mechanism of tomato juice, salt and minced garlic Ni and leave on the fire until it becomes a thick sauce and textures so Kosheri Egyptian sauce is ready.
7. Cook the chickpeas in plenty of water with the addition of part of the chopped garlic, salt and cumin.
8. To work Egyptian Kosheri accuracy we take part of the water after chickpeas cooked and add the amount of the mechanism of chopped garlic with lemon juice.
9. To work chilli sauce we take part of the ready-made sauce and add to it Chilli.
10. to provide Kosheri Egyptian , first put two tablespoons rice and pasta them then lentils and onions reddish dissemination of aspects, chickpeas and finally the sauce, accuracy and felicitously and Shifa.
no image

Mustard & sage chicken with celeriac mash

 Mustard-sage-chicken-celeriac-mash

 Source: bbcgoodfoodme.com

Ingredients

  • 1 celeriac, peeled and cut into chunks
  • 3 chicken breasts, skinless
  • 1 tbsp English mustard powder
  • 2 tsp olive oil
  • 2 garlic cloves, crushed
  • 8 sage leaves, chopped
  • 100g low-fat crème fraîche, plus 2 tbsp for the mash
  • 1 low-sodium chicken stock cube
  • 2 tbsp wholegrain mustard
  • 275g cooked green veg, such as thin-stemmed broccoli, peas or Savoy cabbage, to serve

Method

  1. Put the celeriac in a bowl, add a splash of water and cover with cling film. Pierce the cling film and microwave on High for 10 mins or until really tender.
  2. Meanwhile, put the chicken breasts between 2 sheets of cling film and lightly bash with rolling pin until they are an even thickness. Dust with the mustard powder. Heat the oil in a large frying pan, add the chicken breasts and brown on both sides. Add the garlic and sage to the pan, stirring in the gaps between the chicken, for 30 secs- 1 min, then crumble in the stock cube. Pour in 100ml hot water and add 100g crème fraîche. Stir the sauce around the chicken, then cover the pan with a lid and cook over a medium heat for 8 mins or until the chicken is cooked through. Stir through the mustard and season with plenty of black pepper.
  3. While the chicken cooks, drain any liquid from the celeriac, season, add the remaining 2 tbsp crème fraîche and mash (or blitz to a purée in a food processor). Serve with the chicken and some green veg.
Monday, June 22, 2015
no image

Thai Chicken Salad with Orange Peanut Dressing

Thai Chicken Salad with Orange Peanut Ginger Dressing | Cooking ClassyThai Chicken Salad with Orange Peanut Ginger Dressing | Cooking ClassyThai Chicken Salad with Orange Peanut Ginger Dressing | Cooking Classy

Thai Chicken Salad with Orange Peanut Dressing
Yield: About 4 servings
Ingredients
    Dressing
  • 1/2 cup creamy peanut butter
  • 2 tsp orange zest
  • 1/2 cup freshly squeezed orange juice*
  • 2 Tbsp rice vinegar
  • 1 Tbsp low-sodium soy sauce
  • 1 Tbsp peeled and grated ginger
  • 1 Tbsp packed brown sugar
  • 1 small clove garlic
  • Salt to taste
  • 1/4 tsp red pepper flakes, more or less to taste
  • Salad
  • 1 lb boneless skilled chicken breasts, grilled and sliced
  • 1 large head romain lettuce, chopped
  • 3 carrots, peeled and chopped
  • 1 large red bell pepper, seeded and chopped
  • 1 cup frozen shelled edamame, thawed
  • 2/3 cup salted cashews, roughly chopped
  • 1 cup wonton strips
  • 1/4 cup cilantro leaves
  • White and black sesame seeds, for garnish (optional)

Directions
  • For the dressing:
  • Add all dressing ingredients to a blender, except red pepper flakes, pulse until ginger and garlic are finely minced. Season with salt to taste and add red pepper flakes and pulse just to stir in. Pour into an airtight container and chill until ready to serve.
  • For the salad:
  • Add all salad ingredients to a large salad bowl, pour dressing over and toss to evenly coat. Serve immediately.
  • *If you want it a slightly thicker dressing use 2 Tbsp less orange juice.
  • Recipe source: dressing inspired by Whole Foods
no image

Fruit Punch


It’s time to sneak some fruit juice into your kids soda =).  I love this drink because it really is a fruit punch.  It’s made of half fruit juice, it’s not like those sodas flavored with artificial fruit flavors.  This punch also gets an incredible boost of flavor from the almond extract in it.  This beverage is family friendly because it contains no alcohol so it would be a great homemade drink to make for family parties.  One definite highlight of this drink is it’s simplicity, you could have it made in under a minute.  I also love that it tastes surprisingly different than your average fruit punch, in my opinion better.
Random funny thing, I rarely run out of ice in my home (because I hate exercising without an ice cold glass of water so I always keep it stocked, it’s a must, a bare necessity) but the one time I go to take pics to blog this drink of course, no ice  =).  We’ll say I did it on purpose though because it’s still winter and I didn’t want the drink to be too chilled.  Drinks just look prettier with it though don’t they?  With or without ice this is one incredible and very simple drink to make.  It’s delightfully refreshing, even on a cold winter day.

Fruit Punch
Yield: 1 liter
Ingredients
  • 2 cups apple juice, chilled
  • 2 cups grape juice, chilled
  • 2 tsp almond extract
  • 4 cups lemon lime flavored soda, such as Sprite, chilled
Directions
  • In a large pitcher, stir together apple juice, grape juice and almond extract. Pour in lemon lime soda and give it a quick stir (just don't over-mix after adding the soda or you will stir out the carbonation).
  • Recipe Source: Cooking Classy
no image

Carrot Zucchini Bread

Carrot Zucchini Bread (with optional Cream Cheese Frosting) | Cooking Classy
If you like carrot cake or zucchini cake you’ll definitely want to try this recipe. I don’t post bread recipes very often, but that should change because this bread tastes like cake! It’s a little bit denser than a carrot cake and not quite as sweet, but it tastes just as incredible.
This bread has such a soft and moist crumb thanks to all the moisture from the shredded carrots and zucchini. It also has just the right amount of sweetness and the perfect touch of cinnamon. If you want to splurge a little then I’d recommend going for the frosted topping and finishing it off with chopped pecans. When you can top it with frosting, why not (that could be a dangerous thought for me – who knows how far I could take that :))? I love the sweet, creamy, fluffiness frosting offers. It just makes it extra special, because it isn’t often you get a loaf of bread covered with a layer of cream cheese frosting.
Add this one to your list because it will likely find a place in your recipe box right next to your favorite banana bread recipe. Enjoy!
Carrot Zucchini Bread (with optional Cream Cheese Frosting) | Cooking Classy

Carrot Zucchini Bread
Prep Time: 20 minutes
Cook Time: 55 minutes
Yield: 2 loaves - about 16 slices total
Ingredients
  • 3 cups all-purpose flour
  • 1 1/2 tsp baking powder
  • 3/4 tsp baking soda
  • 3/4 tsp salt
  • 1 3/4 tsp ground cinnamon
  • 1/4 tsp ground nutmeg
  • 3/4 cup granulated sugar
  • 3/4 cup packed light-brown sugar
  • 1/2 cup canola oil
  • 6 Tbsp unsweetened applesauce
  • 3 large eggs
  • 1 1/2 tsp vanilla extract
  • 1 1/2 cups finely shredded, peeled carrots (from about 3 medium carrots)
  • 1 1/2 cups finely shredded zucchini (from about 2 small zucchini)
  • Frosting (optional)
  • 6 Tbsp unsalted butter, softened
  • 5 oz cream cheese, softened
  • 2 1/2 cups powdered sugar
  • 1/2 tsp vanilla extract
  • 1/2 cup chopped pecans or walnuts

Directions
  • Preheat oven to 350 degrees. Butter and lightly flour two 8 by 4-inch loaf pans and set aside.
  • In a mixing bowl, whisk together flour, baking powder, baking soda, salt, cinnamon and nutmeg for 30 seconds. In a separate large mixing bowl, whisk together granulated sugar and brown sugar until well blended, then add canola oil, applesauce, eggs and vanilla and whisk until well combined, about 30 seconds - 1 minute. Stir in shredded carrots and zucchini, then add flour mixture all at once, and using a rubber spatula, fold mixture just until combined.
  • Divide mixture among two prepared loaf pans. Bake in preheated oven for 35 minutes then (without removing loaves from oven) quickly tent loaves with a sheet of aluminum foil (to prevent top from excessive browning) and continue to bake 15 - 20 minutes longer, or until toothpick inserted into center of loaf comes out clean. Allow to cool in loaf pan 5 minutes, then invert onto a wire rack and cool completely. Frost with cream cheese frosting if desired and top with chopped pecans. Store in an airtight container.
  • For the frosting:
  • In a mixing bowl, using an electric hand mixer, whip together butter and cream cheese until smooth and fluffy. Add powdered sugar and vanilla and whip on medium-high speed until smooth and fluffy, about 3 minutes.
  • Recipe Source: Cooking Classy
no image

Indian Fry Bread


I will always love Navajo Tacos. I’ve eaten them ever since I can remember. My mom makes the best Navajo Tacos ever (Navajo taco topping anyway =). She would cheat a little and use frozen Rhodes Rolls dough for the fry bread portion, which was also delicious but nothing compares to homemade Navajo fry bread. If you want to use frozen roll dough, all you have to do is fully thaw and rise the dough (according to directions on package) then fry it and top with the Navajo taco topping. This recipe I created for the fry bread really is incredibly simple though, you can basically make it in the time it takes just to prepare the roll dough for thawing.
I decided to use two leavening agents for the fry bread because I wanted the slight flavor yeast gives without having to have it rise for hours, but if you don’t have yeast on hand you could just add another teaspoon of baking powder.
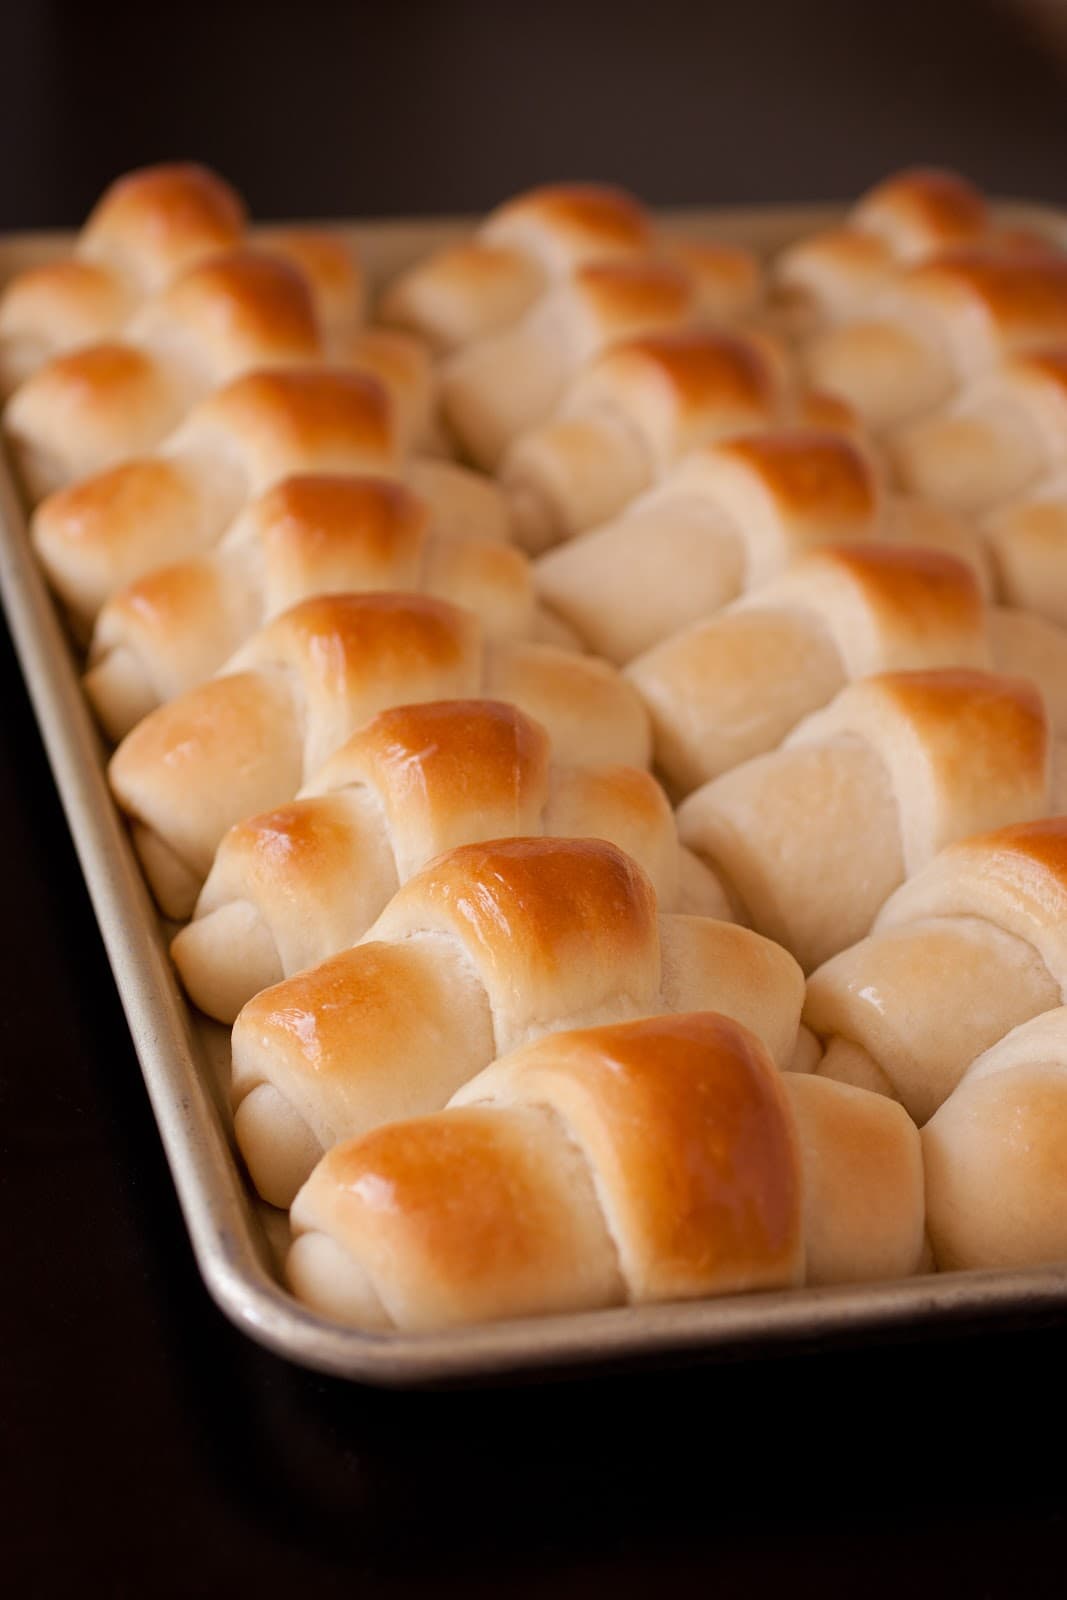
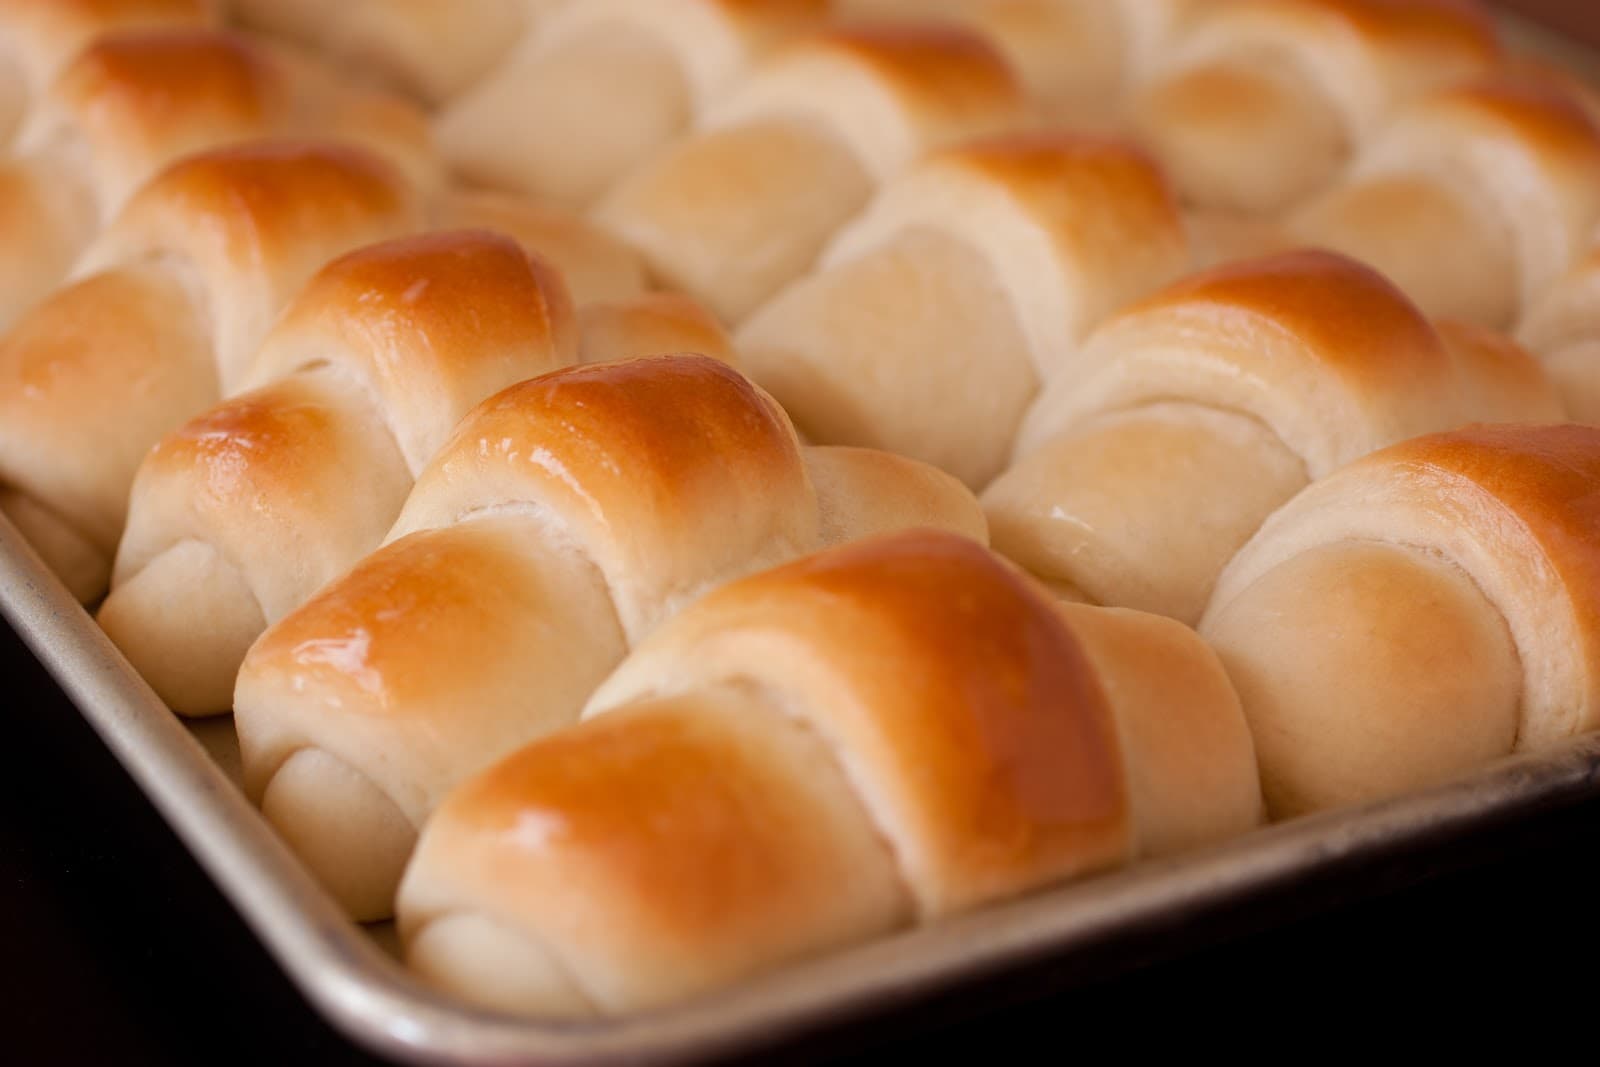
I would highly recommend you make 1 1/2 (or double) the recipe listed so you have left over fry bread to warm and serve with honey butter. I love this meal because you get dinner and an incredible dessert with the left over fry bread.
My mom’s recipe uses a few things not found in your traditional Navajo taco filling that I think are excellent improvements, basically musts. Many recipes don’t have beans or canned tomatoes or even seasonings. My mom would use taco seasoning but I basically just added my own because I don’t buy taco seasoning often. Also, I like to add more traditional Mexican foods like salsa, Mexican hot sauce, cilantro and avocados.
Another great Navajo Taco filling is left over 
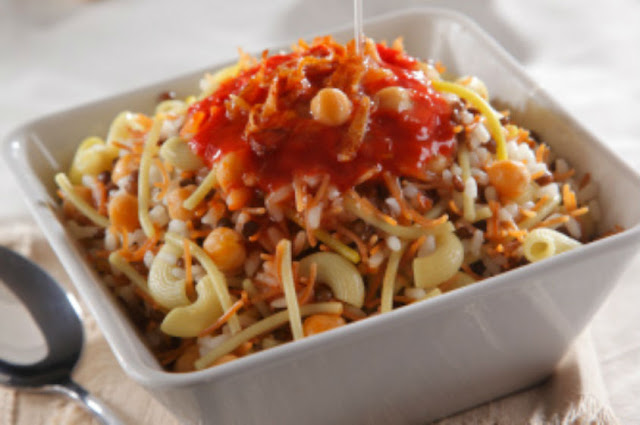
chili (it doesn’t have to be my chili recipe, any good ground beef chili would be great =). Use a slotted spoon when serving it so you don’t make the fry bread soggy. If you haven’t ever had Navajo Fry Bread (aka Indian Fry Bread) or Navajo tacos, then I’m telling you now is the time to try it! A pillow-y, soft center is encased by a lightly crisp, chewy, perfectly fried and golden exterior then its generously topped with a browned beef, deliciously flavorful taco filling and then it’s garnished with more toppings that perfectly compliment and blend all the flavors. It is definitely a satisfying taco. Yum yum YUM! Enjoy!

Who knows why I can’t dollop sour cream in the center, we’ll just say I meant to do that =)


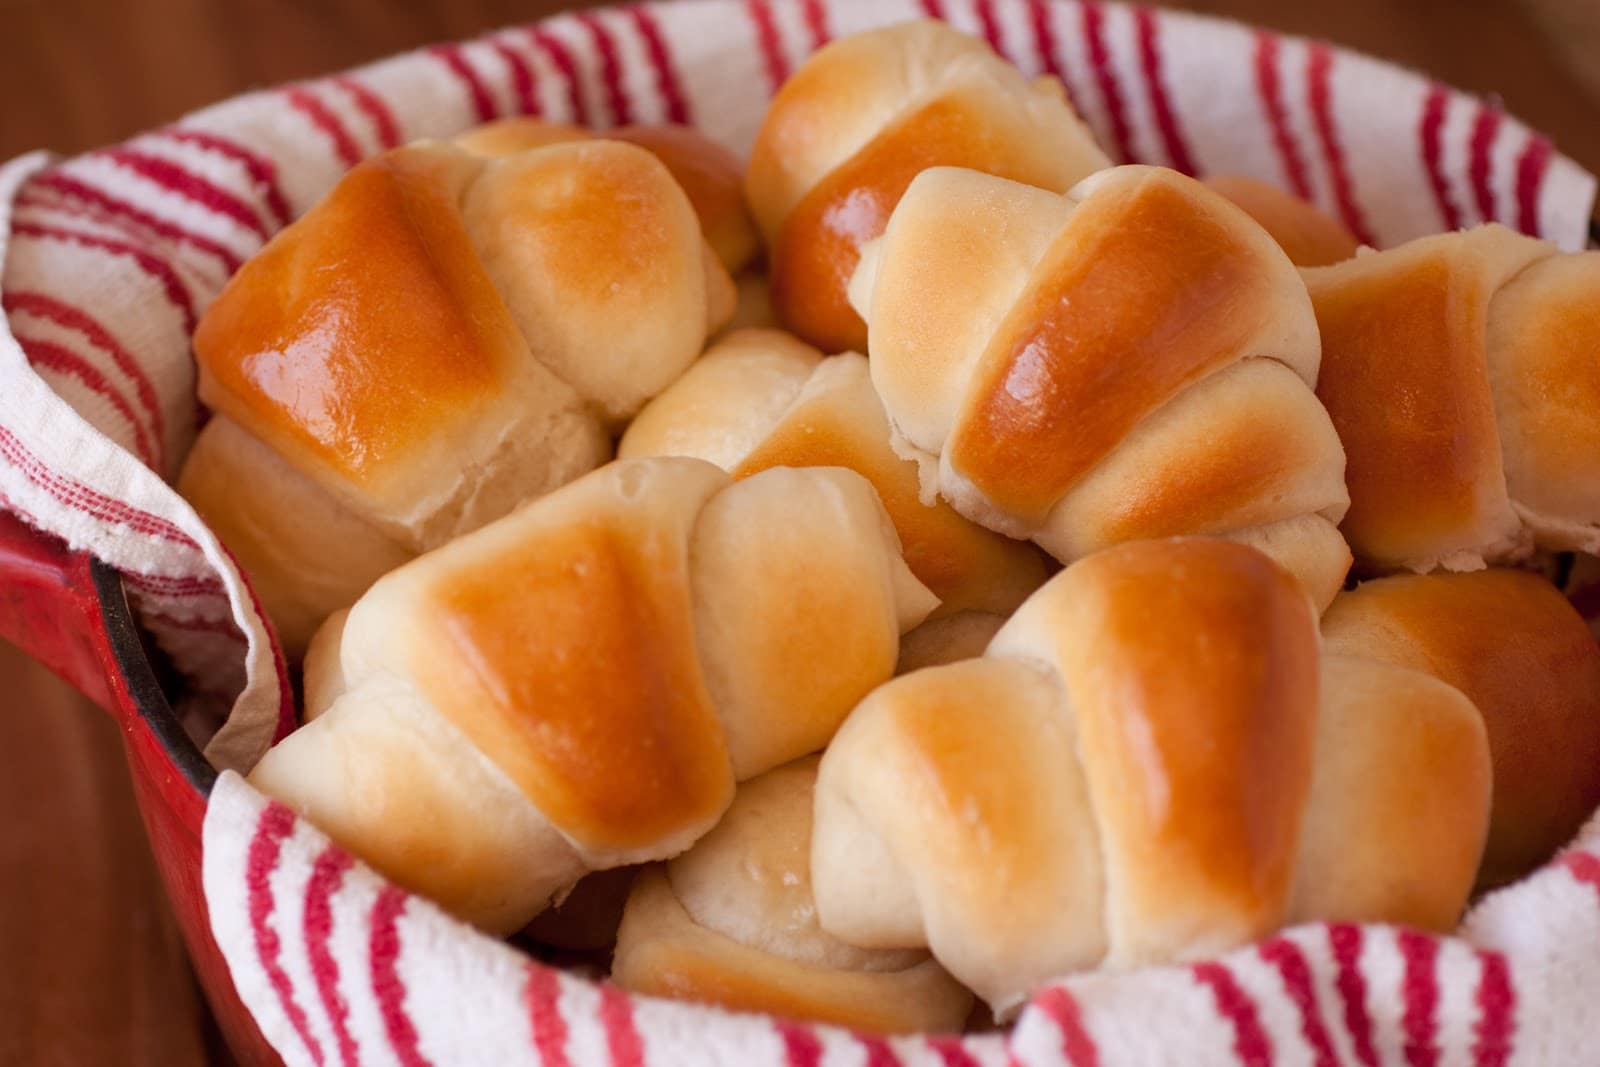
So good with honey or honey butter…


Mom’s Navajo Tacos and Indian Fry Bread
Yield: 8 tacos
Ingredients
  • 1 Tbsp olive oil
  • 1 lb lean ground beef
  • 1/2 cup yellow onion, diced
  • 2 cloves garlic finely minced
  • 2 tsp chili powder
  • 1 tsp paprika
  • 1/2 tsp cumin
  • 1 (15 oz) can dark red kidney beans, drained and rinsed
  • 1 (14.5 oz) can petite diced tomatoes, drained
  • 1 (4 oz) can diced green chilis
  • salt and pepper, to taste
  • For serving
  • Navajo Fry Bread, recipe follows
  • Romaine or Iceberg lettuce, chopped
  • Cheddar or Monterrey Jack cheese (I use a combo of both), grated
  • Roma tomatoes, diced
  • sour cream
  • Other optional toppings I sometimes add
  • black olives, sliced
  • avocados, diced
  • fresh salsa
  • hot sauce (you could add cayenne pepper to the taco filling as well)
  • cilantro, chopped
  • Navajo Fry Bread
  • 2 cups all-purpose flour
  • 1 1/2 tsp baking powder
  • 1/2 tsp active dry yeast
  • 1/2 tsp salt
  • 3/4 - 1 cup warm milk (110 degrees)
  • 1 Tbsp butter or shortening, melted
  • Vegetable oil, for frying (sometimes I use half olive oil)
Directions
  • Heat olive oil in a large non-stick skillet over medium high heat. Once oil is hot, crumble beef into oil, add onions and cook, stirring occasionally and breaking up beef when stirring, until beef has browned and cooked through. Drain fat from beef and return to skillet (my mom doesn't drain the fat, she says it gives it more flavor so you can leave it if you'd like). Stir in garlic, chili powder, paprika, cumin, kidney beans, canned diced tomatoes and green chilis then season mixture with salt and pepper to taste. Simmer, uncovered for 10-15 minutes. Using a slotted spoon, spoon mixture over Navajo Fry bread, then top with lettuce, cheese, tomatoes and sour cream (and any of the other optional toppings listed). Serve immediately.
  • Navajo Fry Bread
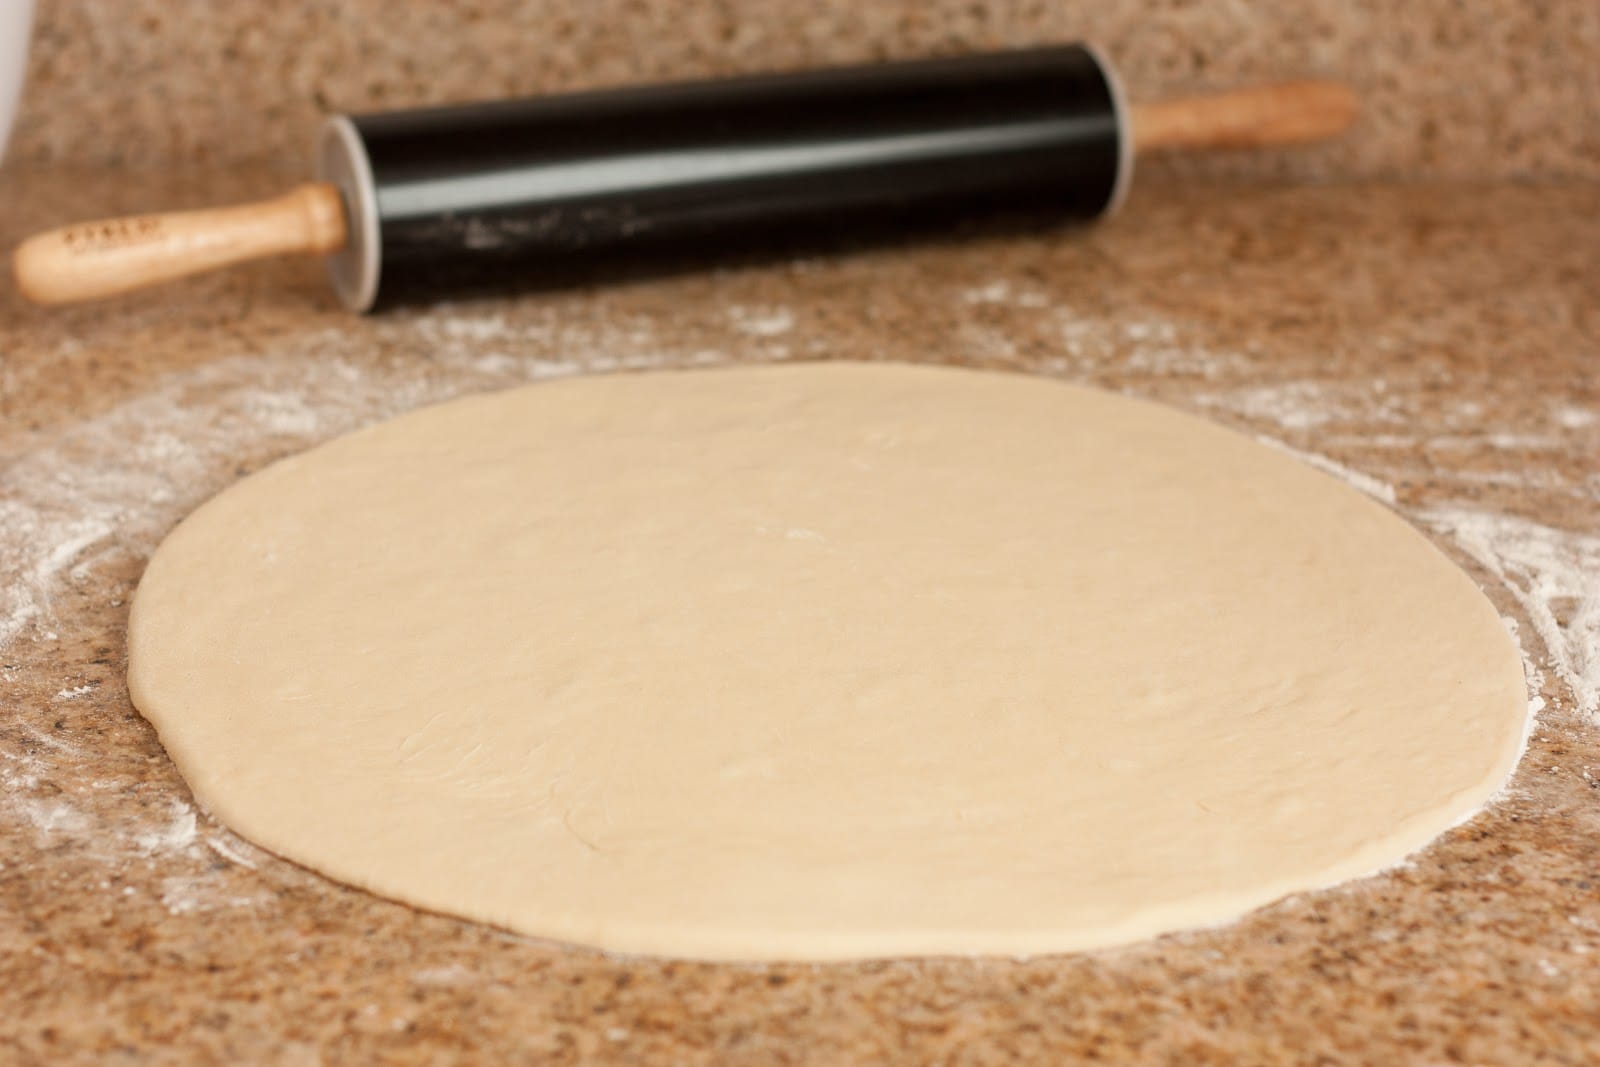
  • In a mixing bowl, whisk together flour, baking powder, yeast and salt. Whisk melted butter into warm milk and pour milk mixture into dry ingredients. Stir until mixture comes together and forms a ball, dough should be slightly sticky and elastic so add an up to an additional 1/4 cup milk as needed. Cover dough with plastic wrap and allow to rest 10 minutes. Heat 1 inch of oil in a large cast iron skillet to 350 - 360 degrees over stove top. Divide rested dough into 10 equal pieces. Working with floured hands and one piece of dough at a time (keep other pieces covered with plastic wrap), roll dough out on a lightly floured surface into a 5 - 6-inch circle and gently drop into hot oil, and cook until golden brown, then rotate and cook opposite side until golden brown. Remove from oil and drain onto a plate or baking sheet lined with paper towels. Serve warm with Navajo Taco topping or for dessert, spread with honey butter.
  • Recipe Source: Cooking Classy
no image

Amazing Dinner Rolls


Is there anything like a fresh, hot out of the oven, homemade dinner roll? Dinner rolls are a classic that will never fade. These dinner rolls are dangerously good! How could something with so few simple ingredients be so delicious? I will tell you how: lots of butter, whole milk and a little patience. While creating this recipe, I was looking to achieve a tender, pillow-y soft texture, along with a light sweetness that wasn’t overpowering (if I wanted a roll that was super sweet I’d just have cake), with just the right amount of moisture and fats – hence the use of whole milk along with the butter. I prefer a larger ratio of milk than water because water has zero flavor so why let it waste good space in the roll?
I love making fresh breads and rolls, because I let my KitchenAid mixer do all the work =). The hardest part is that “little patience” I mentioned before, the rising time. I wish they’d just go POOF! in a number of seconds and be beautifully risen. If only. The nice thing about it though is that it basically forces me to get that sink-full of dishes done while I’m waiting. If you don’t have a stand mixer you could also make these the good old fashioned way, kneading by hand.
I hope you love these rolls and serve them as the perfect complement to your holiday feasts and family gatherings. Come back soon as I’ll be posting 3 specialty butter recipes that you can spread along these divine dinner rolls (as if they needed any upgrade but these butters just push the rolls over the top).  Enjoy and share… really, because I’m warning you if you don’t share you’ll want all 24 rolls to yourself!

Amazing Dinner Rolls
Yield: 2 dozen
Ingredients
  • 1/3 cup warm water, 110 - 115 degrees
  • 2 1/4 tsp active dry yeast
  • 1/3 cup + 1/4 tsp granulated sugar
  • 1 1/3 cups whole milk, warmed to 110 - 115 degrees
  • 3/4 cup salted butter, at room temperature, divided
  • 1 large egg, at room temperature
  • 1 1/2 tsp salt
  • 4 1/2 cups all-purpose flour*
Directions
  • Measure out warm water into a liquid measuring cup then stir in yeast and 1/4 tsp sugar, whisk until yeast has dissolved then let rest 5 - 10 minutes until mixture is foamy. Pour yeast mixture (scrapping out excess) into the bowl of an electric stand mixer fitted with whisk attachment, add in 1/3 cup sugar, warm milk, 5 Tbsp butter, egg and salt. Blend mixture until combine. Add in 2 cups flour and mix until well combine. Switch attachment to a dough hook, with mixer on low speed, slowly add remaining 2 1/2 cups flour and mix until dough is smooth and elastic, about 4 - 5 minutes (dough should be slightly sticky when touched). Transfer dough to a greased, large mixing bowl and cover bowl with plastic wrap. Allow dough to rise in a warm place, free from draft, until double in size, about 1 1/2 hours.
  • Punch dough down and divide dough into two equal portions. Shape each portion into a ball. Roll each dough ball out on a lightly floured surface into a large circle about 13 inches across (try to keep dough as much of an even thickness as possible). Spread each circle of dough evenly with 2 Tbsp butter. Cut each circle into 4 equal quarters, then each quarter into 3 wedges (just imagine cutting pizza slices or pie slices). Roll each wedge up, beginning on wide (outside) edge. Transfer rolls to a buttered 10 x 15 inch cookie sheet (the tip of the rolled wedge should be tucked on the bottom. Note that you can fit 3 rows of 8 rolls). Cover rolls loosely with plastic wrap and let rise in a warm place until double in size, about 1 hour. During the last 10 minutes of rising preheat oven to 375 degrees.
  • Remove plastic wrap and bake rolls in preheated oven for 15 - 19 minutes until golden brown. Remove from oven and brush with remaining 3 Tbsp butter (you may not need all of it). Serve warm or allow to cool and store in an airtight container.
  • Recipe Source: Cooking Classy
Notes
*I found 4 1/2 cups to be perfect for me but if you live somewhere very dry or humid, or at a very high altitude you may want to reduce or increase measurement by a 1/4 of a cup, just note the dough should be fairly sticky. Don't add too much flour or your roll will be heavy. The dough should be sticking to the bottom of the mixing bowl near the end of mixing just not the sides. It should stick slightly to a clean fingertip then spring back slightly when pulled away. Not gummy and not dry. Most of you will probably find 4 1/2 cups to work just right as well.
After first rise, divide dough into two equal portions and shape each into a ball.
Roll each ball into a 13 inch circle.

Spread softened butter evenly over entire surface. Using a pizza wheel, cut circle into 4 equal quarters then cut each quarter into 3 equal wedges.

Snugly roll each wedge.

The tip of the wedge should be tucked under the bottom, like so.

Transfer and align rolls on a buttered baking dish.

Cover with plastic wrap and let rest until double in size, about 1 hour.

Bake in preheated oven 14 – 16 minutes.

Coat tops with butter.

Pull rolls apart. Serve warm.
Sunday, June 21, 2015
Grilled Eggplant Parmesan

Grilled Eggplant Parmesan

Grilled Eggplant Parmesan
 

What You Need     
by: 

Serves: 4 to 6
  • 24-ounce jar marinara sauce
  • 3 eggs
  • ¾ cup grated Parmesan cheese
  • ¾ cup bread crumbs
  • 3 medium eggplants (2 to 3 pounds total)
  • Kosher salt
  • Fresh ground pepper
  • Olive oil or cooking spray
  • 2 cups grated cheese (Italian blend, fontina, etc)
  • Fresh basil leaves
What To Do
  1. Heat a grill to medium-high heat.
  2. Wash the eggplants and cut them into ¼-inch thick disks.
  3. In a small bowl, whisk together 3 egg whites.
  4. In a shallow pan, mix together ¾ cup grated Parmesan cheese and ¾ cup bread crumbs.
  5. Dip each eggplant slice in egg whites, and then dredge each side in bread crumb mixture. Place on a large baking sheet. Repeat for all slices. When finished, spray each side with olive oil or cooking spray and season liberally with kosher salt and pepper.
  6. On a grill, cook over direct medium high heat until the bottom is golden, about 4 to 5 minutes. Flip the eggplant rounds and top each piece with shredded cheese. Continue cooking with the top on until golden and the cheese is melted, about 4 to 5 minutes.
  7. Meanwhile, warm the marinara sauce. When the eggplant is grilled, place several slices on a plate, top with marinara sauce, if desired a bit of olive oil and kosher salt, and basil leaves.
Notes
Adapted from Weber's Time to Grill
Watermelon & Avocado Kale Salad

Watermelon & Avocado Kale Salad


Prep time
Total time
 
Serves: serves 2 as lunch, 4 as a side
Ingredients
  • one small bunch of curly kale
  • 1 tablespoons extra-virgin olive oil
  • 1 teaspoon lemon juice, more to taste
  • 1 teaspoon white wine vinegar
  • 1 small fennel bulb, very thinly sliced
  • 1 small cucumber, very thinly sliced
  • 3 small radishes, thinly sliced
  • 2 scallions, chopped
  • ½ avocado, pitted and cubed
  • ¼ cup crumbled feta cheese
  • 4 cups cubed watermelon, seeds removed
  • sea salt and freshly ground black pepper
Instructions
  1. Remove the coarse stems of the kale and tear the curly leaves into small pieces. Place them in a large bowl with a drizzle of olive oil, salt, pepper, lemon and white wine vinegar. Use your hands to massage the kale leaves until they’re soft and tender. They should shrink down to about half the amount that you started with.
  2. Add the sliced fennel, cucumber, radishes, scallions, avocado, feta and toss. Add the watermelon and toss again. Taste, and add more salt, pepper, lemon and/or olive oil as you like.

  
Click here to browse more recipes!

Copyright © 2012 bpressv1.6 All Right Reserved
Designed by CBTblogger